

Dodowa POP Ceiling Project
Dodowa POP Ceiling Project
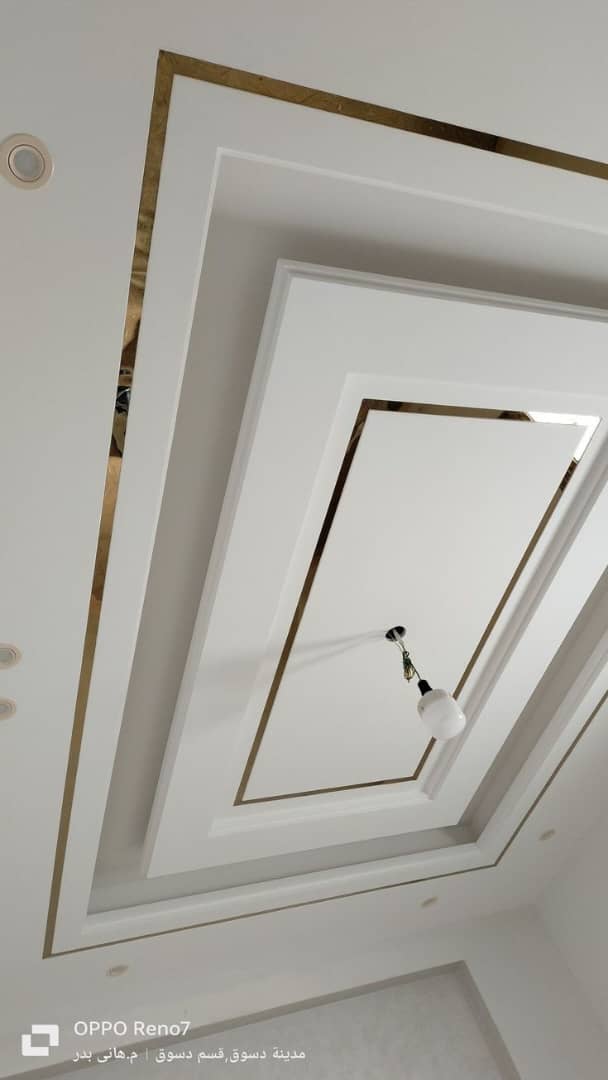
Whether you’re looking to revamp your home, office, or commercial establishment, Mawuli POP ceiling Services offers a versatile and stylish solution that transcends the ordinary.

1. Initial Consultation
- Site Visit: We scheduled a visit to the client’s location to assess the space and discuss their requirements.
- Design Discussion: Discussed the desired design, including patterns, lighting integration, and any specific features the client wanted.
- Budget and Timeline: Established a budget and timeline for the project.
2. Design and Planning
- Measurement and Layout: Took precise measurements of the area where the P.O.P. ceiling will be installed.
- Created a Design Plan: Developed a detailed design plan, including sketches or 3D models if possible.
- Material Selection: Chose the appropriate materials, including the type of P.O.P., reinforcing materials, and any decorative elements.
3. Quotation and Approval
- Prepared a Quotation: Provided the client with a detailed quotation that included the cost of materials, labor, and any additional services.
- Client Approval: Once the client approved the quotation and design plan, finalized the contract and scheduled the project start date.
4. Preparation
- Site Preparation: Cleared the work area and protected furniture and flooring. Ensured there was adequate scaffolding or ladders.
- Material Procurement: Ordered and transported all necessary materials to the site.
5. Installation
- Framework Installation: Installed the framework or supported structure for the P.O.P. ceiling. This included metal or wooden frameworks.
- P.O.P. Mixing: Mixed the P.O.P. powder with water to create a workable plaster. Ensured the consistency was suitable for application.
- Application of P.O.P.: Applied the P.O.P. to the framework in layers. Allowed each layer to set before applying the next.
- Detailing: Added any decorative elements, moldings, or patterns as per the design plan.
6. Finishing
- Sanding and Smoothing: Once the P.O.P. was fully set, sanded and smooth the surface to achieve a flawless finishing.
- Painting and Polishing: Applied a primer and then painted the ceiling as desired. Finished with any necessary polishing or additional detailing.
7. Inspection and Handover
- Quality Check: Conducted a thorough inspection to ensure the ceiling met the design specifications and quality standards.
- Client Walkthrough: Walked the client through the completed work, addressing any concerns or adjustments needed.
- Final Clean-up: Cleaned the site, removing any debris or protective coverings.
8. After-Sales Service
- Warranty and Maintenance: Provides the client with information on warranty and maintenance. Offer support for any future issues or modifications.
9. Feedback and Follow-up
- Collect Feedback: Asked the client for feedback on the services provided. Use this feedback to improve future projects.
- Follow-up: Follows up with the client after every few weeks to ensure they are satisfied with the work.
By following these steps, we can ensure a smooth and professional P.O.P. ceiling service, resulting in a satisfied client and a high-quality finish.
Call us or email us now +233(0)243-356-416 / kojomawuli373@gmail.com
Nigeria River State Port Harcourt POP Ceiling Project
Nigeria River State Port Harcourt POP Ceiling Project
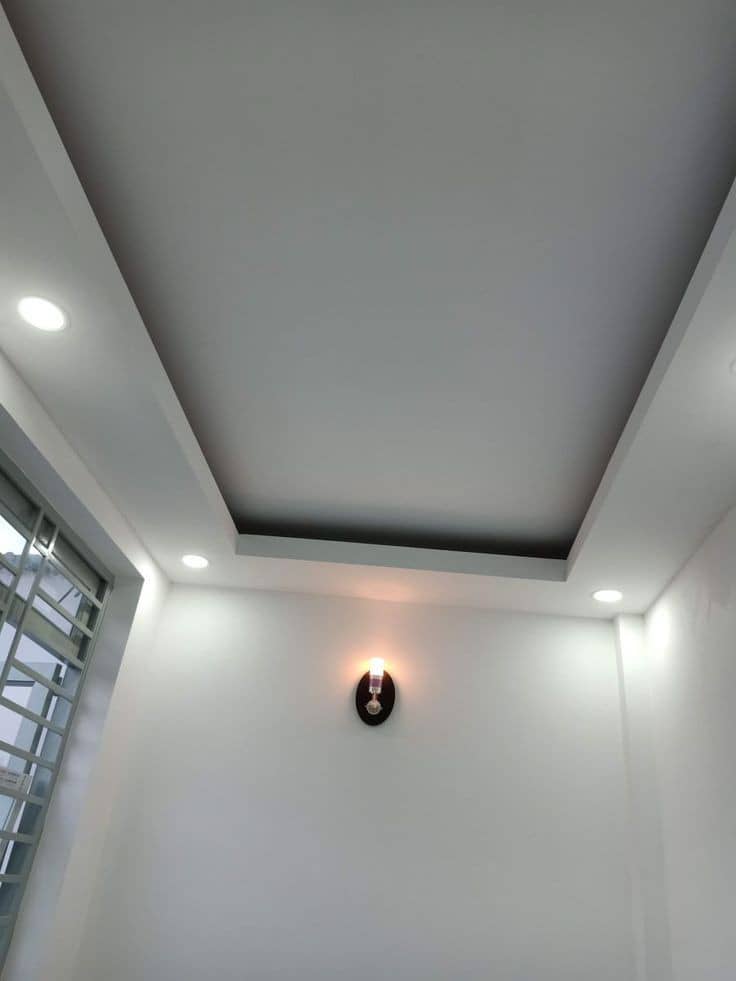
Whether you’re looking to revamp your home, office, or commercial establishment, Mawuli POP ceiling Services offers a versatile and stylish solution that transcends the ordinary.
1. Initial Consultation
- Site Visit: We scheduled a visit to the client’s location to assess the space and discuss their requirements.
- Design Discussion: Discussed the desired design, including patterns, lighting integration, and any specific features the client wanted.
- Budget and Timeline: Established a budget and timeline for the project.
2. Design and Planning
- Measurement and Layout: Took precise measurements of the area where the P.O.P. ceiling will be installed.
- Created a Design Plan: Developed a detailed design plan, including sketches or 3D models if possible.
- Material Selection: Chose the appropriate materials, including the type of P.O.P., reinforcing materials, and any decorative elements.
3. Quotation and Approval
- Prepared a Quotation: Provided the client with a detailed quotation that included the cost of materials, labor, and any additional services.
- Client Approval: Once the client approved the quotation and design plan, finalized the contract and scheduled the project start date.
4. Preparation
- Site Preparation: Cleared the work area and protected furniture and flooring. Ensured there was adequate scaffolding or ladders.
- Material Procurement: Ordered and transported all necessary materials to the site.
5. Installation
- Framework Installation: Installed the framework or supported structure for the P.O.P. ceiling. This included metal or wooden frameworks.
- P.O.P. Mixing: Mixed the P.O.P. powder with water to create a workable plaster. Ensured the consistency was suitable for application.
- Application of P.O.P.: Applied the P.O.P. to the framework in layers. Allowed each layer to set before applying the next.
- Detailing: Added any decorative elements, moldings, or patterns as per the design plan.
6. Finishing
- Sanding and Smoothing: Once the P.O.P. was fully set, sanded and smooth the surface to achieve a flawless finishing.
- Painting and Polishing: Applied a primer and then painted the ceiling as desired. Finished with any necessary polishing or additional detailing.
7. Inspection and Handover
- Quality Check: Conducted a thorough inspection to ensure the ceiling met the design specifications and quality standards.
- Client Walkthrough: Walked the client through the completed work, addressing any concerns or adjustments needed.
- Final Clean-up: Cleaned the site, removing any debris or protective coverings.
8. After-Sales Service
- Warranty and Maintenance: Provides the client with information on warranty and maintenance. Offer support for any future issues or modifications.
9. Feedback and Follow-up
- Collect Feedback: Asked the client for feedback on the services provided. Use this feedback to improve future projects.
- Follow-up: Follows up with the client after every few weeks to ensure they are satisfied with the work.
By following these steps, we can ensure a smooth and professional P.O.P. ceiling service, resulting in a satisfied client and a high-quality finish.
Call us or email us now +233(0)243-356-416 / kojomawuli373@gmail.com

POP Ceiling Nigeria River State Port Harcourt Project
POP Ceiling Nigeria River State Port Harcourt Project
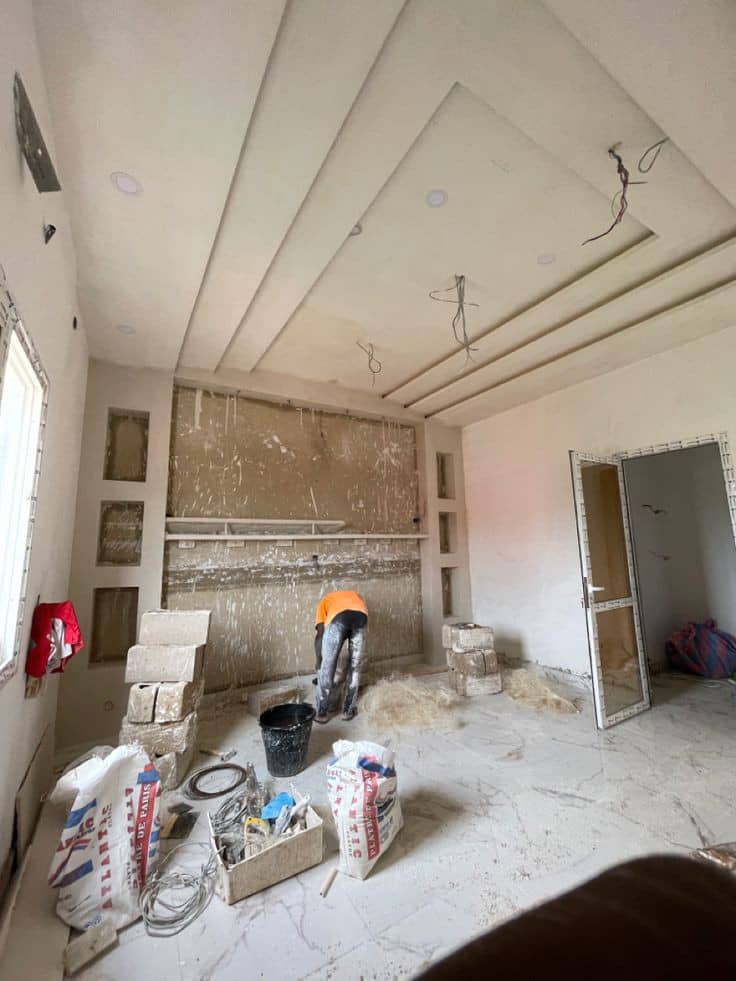
Whether you’re looking to revamp your home, office, or commercial establishment, Mawuli POP ceiling Services offers a versatile and stylish solution that transcends the ordinary.
1. Initial Consultation
- Site Visit: We scheduled a visit to the client’s location to assess the space and discuss their requirements.
- Design Discussion: Discussed the desired design, including patterns, lighting integration, and any specific features the client wanted.
- Budget and Timeline: Established a budget and timeline for the project.
2. Design and Planning
- Measurement and Layout: Took precise measurements of the area where the P.O.P. ceiling will be installed.
- Created a Design Plan: Developed a detailed design plan, including sketches or 3D models if possible.
- Material Selection: Chose the appropriate materials, including the type of P.O.P., reinforcing materials, and any decorative elements.
3. Quotation and Approval
- Prepared a Quotation: Provided the client with a detailed quotation that included the cost of materials, labor, and any additional services.
- Client Approval: Once the client approved the quotation and design plan, finalized the contract and scheduled the project start date.
4. Preparation
- Site Preparation: Cleared the work area and protected furniture and flooring. Ensured there was adequate scaffolding or ladders.
- Material Procurement: Ordered and transported all necessary materials to the site.
5. Installation
- Framework Installation: Installed the framework or supported structure for the P.O.P. ceiling. This included metal or wooden frameworks.
- P.O.P. Mixing: Mixed the P.O.P. powder with water to create a workable plaster. Ensured the consistency was suitable for application.
- Application of P.O.P.: Applied the P.O.P. to the framework in layers. Allowed each layer to set before applying the next.
- Detailing: Added any decorative elements, moldings, or patterns as per the design plan.
6. Finishing
- Sanding and Smoothing: Once the P.O.P. was fully set, sanded and smooth the surface to achieve a flawless finishing.
- Painting and Polishing: Applied a primer and then painted the ceiling as desired. Finished with any necessary polishing or additional detailing.
7. Inspection and Handover
- Quality Check: Conducted a thorough inspection to ensure the ceiling met the design specifications and quality standards.
- Client Walkthrough: Walked the client through the completed work, addressing any concerns or adjustments needed.
- Final Clean-up: Cleaned the site, removing any debris or protective coverings.
8. After-Sales Service
- Warranty and Maintenance: Provides the client with information on warranty and maintenance. Offer support for any future issues or modifications.
9. Feedback and Follow-up
- Collect Feedback: Asked the client for feedback on the services provided. Use this feedback to improve future projects.
- Follow-up: Follows up with the client after every few weeks to ensure they are satisfied with the work.
By following these steps, we can ensure a smooth and professional P.O.P. ceiling service, resulting in a satisfied client and a high-quality finish.
Call us or email us now +233(0)243-356-416 / kojomawuli373@gmail.com
POP Ceiling Services Nigeria River State Port Harcourt
POP Ceiling Services Nigeria River State Port Harcourt
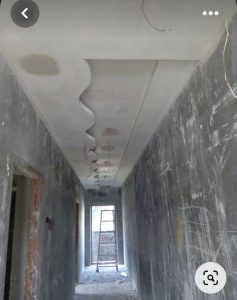
Whether you’re looking to revamp your home, office, or commercial establishment, Mawuli POP ceiling Services offers a versatile and stylish solution that transcends the ordinary.

1. Initial Consultation
- Site Visit: We scheduled a visit to the client’s location to assess the space and discuss their requirements.
- Design Discussion: Discussed the desired design, including patterns, lighting integration, and any specific features the client wanted.
- Budget and Timeline: Established a budget and timeline for the project.
2. Design and Planning
- Measurement and Layout: Took precise measurements of the area where the P.O.P. ceiling will be installed.
- Created a Design Plan: Developed a detailed design plan, including sketches or 3D models if possible.
- Material Selection: Chose the appropriate materials, including the type of P.O.P., reinforcing materials, and any decorative elements.
3. Quotation and Approval
- Prepared a Quotation: Provided the client with a detailed quotation that included the cost of materials, labor, and any additional services.
- Client Approval: Once the client approved the quotation and design plan, finalized the contract and scheduled the project start date.
4. Preparation
- Site Preparation: Cleared the work area and protected furniture and flooring. Ensured there was adequate scaffolding or ladders.
- Material Procurement: Ordered and transported all necessary materials to the site.
5. Installation
- Framework Installation: Installed the framework or supported structure for the P.O.P. ceiling. This included metal or wooden frameworks.
- P.O.P. Mixing: Mixed the P.O.P. powder with water to create a workable plaster. Ensured the consistency was suitable for application.
- Application of P.O.P.: Applied the P.O.P. to the framework in layers. Allowed each layer to set before applying the next.
- Detailing: Added any decorative elements, moldings, or patterns as per the design plan.
6. Finishing
- Sanding and Smoothing: Once the P.O.P. was fully set, sanded and smooth the surface to achieve a flawless finishing.
- Painting and Polishing: Applied a primer and then painted the ceiling as desired. Finished with any necessary polishing or additional detailing.
7. Inspection and Handover
- Quality Check: Conducted a thorough inspection to ensure the ceiling met the design specifications and quality standards.
- Client Walkthrough: Walked the client through the completed work, addressing any concerns or adjustments needed.
- Final Clean-up: Cleaned the site, removing any debris or protective coverings.
8. After-Sales Service
- Warranty and Maintenance: Provides the client with information on warranty and maintenance. Offer support for any future issues or modifications.
9. Feedback and Follow-up
- Collect Feedback: Asked the client for feedback on the services provided. Use this feedback to improve future projects.
- Follow-up: Follows up with the client after every few weeks to ensure they are satisfied with the work.
By following these steps, we can ensure a smooth and professional P.O.P. ceiling service, resulting in a satisfied client and a high-quality finish.
Call us or email us now +233(0)243-356-416 / kojomawuli373@gmail.com
POP Ceiling Project Nigeria River State Port Harcourt
POP Ceiling Project Nigeria River State Port Harcourt
Whether you’re looking to revamp your home, office, or commercial establishment, Mawuli POP ceiling Services offers a versatile and stylish solution that transcends the ordinary.

1. Initial Consultation
- Site Visit: We scheduled a visit to the client’s location to assess the space and discuss their requirements.
- Design Discussion: Discussed the desired design, including patterns, lighting integration, and any specific features the client wanted.
- Budget and Timeline: Established a budget and timeline for the project.
2. Design and Planning
- Measurement and Layout: Took precise measurements of the area where the P.O.P. ceiling will be installed.
- Created a Design Plan: Developed a detailed design plan, including sketches or 3D models if possible.
- Material Selection: Chose the appropriate materials, including the type of P.O.P., reinforcing materials, and any decorative elements.
3. Quotation and Approval
- Prepared a Quotation: Provided the client with a detailed quotation that included the cost of materials, labor, and any additional services.
- Client Approval: Once the client approved the quotation and design plan, finalized the contract and scheduled the project start date.
4. Preparation
- Site Preparation: Cleared the work area and protected furniture and flooring. Ensured there was adequate scaffolding or ladders.
- Material Procurement: Ordered and transported all necessary materials to the site.
5. Installation
- Framework Installation: Installed the framework or supported structure for the P.O.P. ceiling. This included metal or wooden frameworks.
- P.O.P. Mixing: Mixed the P.O.P. powder with water to create a workable plaster. Ensured the consistency was suitable for application.
- Application of P.O.P.: Applied the P.O.P. to the framework in layers. Allowed each layer to set before applying the next.
- Detailing: Added any decorative elements, moldings, or patterns as per the design plan.
6. Finishing
- Sanding and Smoothing: Once the P.O.P. was fully set, sanded and smooth the surface to achieve a flawless finishing.
- Painting and Polishing: Applied a primer and then painted the ceiling as desired. Finished with any necessary polishing or additional detailing.
7. Inspection and Handover
- Quality Check: Conducted a thorough inspection to ensure the ceiling met the design specifications and quality standards.
- Client Walkthrough: Walked the client through the completed work, addressing any concerns or adjustments needed.
- Final Clean-up: Cleaned the site, removing any debris or protective coverings.
8. After-Sales Service
- Warranty and Maintenance: Provides the client with information on warranty and maintenance. Offer support for any future issues or modifications.
9. Feedback and Follow-up
- Collect Feedback: Asked the client for feedback on the services provided. Use this feedback to improve future projects.
- Follow-up: Follows up with the client after every few weeks to ensure they are satisfied with the work.
By following these steps, we can ensure a smooth and professional P.O.P. ceiling service, resulting in a satisfied client and a high-quality finish.
Call us or email us now +233(0)243-356-416 / kojomawuli373@gmail.com
Nigeria River State Port Harcourt POP Project
Nigeria River State Port Harcourt POP Project
Whether you’re looking to revamp your home, office, or commercial establishment, Mawuli POP ceiling Services offers a versatile and stylish solution that transcends the ordinary.
1. Initial Consultation
- Site Visit: We scheduled a visit to the client’s location to assess the space and discuss their requirements.
- Design Discussion: Discussed the desired design, including patterns, lighting integration, and any specific features the client wanted.
- Budget and Timeline: Established a budget and timeline for the project.
2. Design and Planning
- Measurement and Layout: Took precise measurements of the area where the P.O.P. ceiling will be installed.
- Created a Design Plan: Developed a detailed design plan, including sketches or 3D models if possible.
- Material Selection: Chose the appropriate materials, including the type of P.O.P., reinforcing materials, and any decorative elements.
3. Quotation and Approval
- Prepared a Quotation: Provided the client with a detailed quotation that included the cost of materials, labor, and any additional services.
- Client Approval: Once the client approved the quotation and design plan, finalized the contract and scheduled the project start date.
4. Preparation
- Site Preparation: Cleared the work area and protected furniture and flooring. Ensured there was adequate scaffolding or ladders.
- Material Procurement: Ordered and transported all necessary materials to the site.
5. Installation
- Framework Installation: Installed the framework or supported structure for the P.O.P. ceiling. This included metal or wooden frameworks.
- P.O.P. Mixing: Mixed the P.O.P. powder with water to create a workable plaster. Ensured the consistency was suitable for application.
- Application of P.O.P.: Applied the P.O.P. to the framework in layers. Allowed each layer to set before applying the next.
- Detailing: Added any decorative elements, moldings, or patterns as per the design plan.
6. Finishing
- Sanding and Smoothing: Once the P.O.P. was fully set, sanded and smooth the surface to achieve a flawless finishing.
- Painting and Polishing: Applied a primer and then painted the ceiling as desired. Finished with any necessary polishing or additional detailing.
7. Inspection and Handover
- Quality Check: Conducted a thorough inspection to ensure the ceiling met the design specifications and quality standards.
- Client Walkthrough: Walked the client through the completed work, addressing any concerns or adjustments needed.
- Final Clean-up: Cleaned the site, removing any debris or protective coverings.
8. After-Sales Service
- Warranty and Maintenance: Provides the client with information on warranty and maintenance. Offer support for any future issues or modifications.
9. Feedback and Follow-up
- Collect Feedback: Asked the client for feedback on the services provided. Use this feedback to improve future projects.
- Follow-up: Follows up with the client after every few weeks to ensure they are satisfied with the work.
By following these steps, we can ensure a smooth and professional P.O.P. ceiling service, resulting in a satisfied client and a high-quality finish.
Call us or email us now +233(0)243-356-416 / kojomawuli373@gmail.com